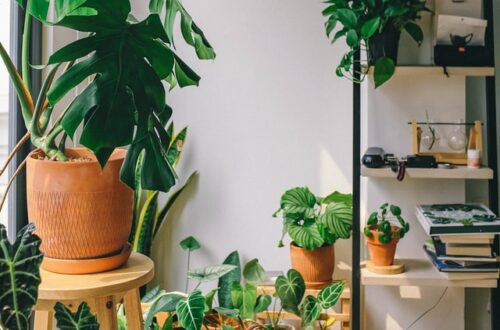
How to Repot Your Houseplant
Whether you find it therapeutic or an annoyance, sooner or later you will have to repot your houseplant. Repotting your plant does not need to be stressful, even if you’ve never done it before! In fact, it can be very relaxing. The key is to plan ahead. Luckily you’ve come to the right place! Here’s how to repot your houseplant, and signs that your plant needs to be repotted.
First, how do you know if your plant needs to be repotted?
There could be a few signs that it’s time to repot your houseplant. One of the most likely reasons your plant needs to be repotted is that it’s simply outgrown its current pot and is ready for an upgrade. This is known as “root bound” or “pot bound”, where your plant’s roots are essentially bursting out of its pot. In the jungle, tropical plants have much more room to spread their roots and grow to infinite heights, but when we keep plants in a pot, we need to keep an eye out to make sure your plant has enough space.
Here are a few signs that your houseplant is root bound:
- Roots are poking out of the tops of the soil
- Roots are poking out through the drainage holes
- Your plant has been drying out too quickly
- Your plant roots are tightly packed and have formed to the shape of the pot
- The plant is showing signs of general unhappiness, and other causes have been ruled out
Other Reasons Your Plant May Need to Be Repotted:
The soil is not suitable for the plant
It could be either incorrect soil type, not enough drainage, too much drainage, or it’s devoid of nutrients.
The pot is not suitable
- Retains too much moisture
- Not enough drainage
- Does not retain enough moisture
- See my blog for how to choose the best pot for your houseplants!
Recent pest infestation requiring a complete soil swap
You’ve Determined Now is the Time to Repot Your Houseplant. Now What?
Don’t worry, repotting your plant is not as scary as you think! Below is a step-by-step guide on how to repot your houseplant so you can set your plant up for success in their new home!
How to Repot Your Houseplant:
1. Make sure that you are set up for success before you begin
Before you begin to repot your houseplant, get yourself set up in an area that you don’t mind getting a little messy. You’ll be dealing with lots of soil! A table that easily cleanable, outside on your back patio, or a floor that you can quickly vacuum are some great spots to repot (Avoid light coloured carpets…trust me on this one!)
2. Make sure you have the following handy:
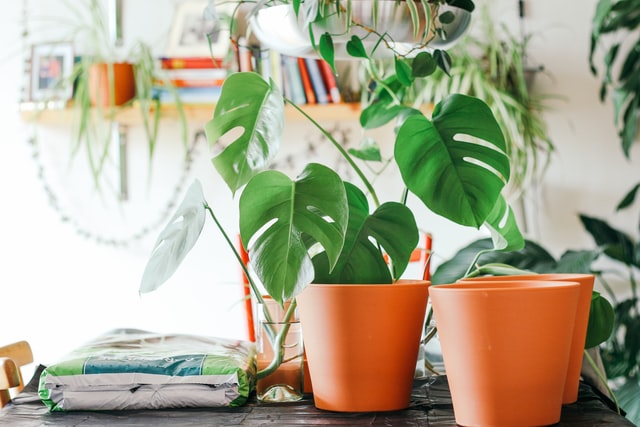
- A new pot (if you are repotting a root bound plant, the general rule of thumb is 2 inches larger in diameter than its previous pot. Any bigger and you might risk root rot, any smaller and you might need to repot again very soon!)
- Appropriate soil or potting media for your plant (full blog on this coming soon but this could include lecca, moss, orchid bark, etc).
- Any gardening tools or gloves if you need them (trowel, cup, or up cycled nursery pot to handle soil)
- Any moss poles or trellises that you may need (full blog coming soon!)
- Your plant! I personally find it easier to repot your plant when the soil is dry, but feel free to try it either way (sometimes desperate times call for desperate measures!)
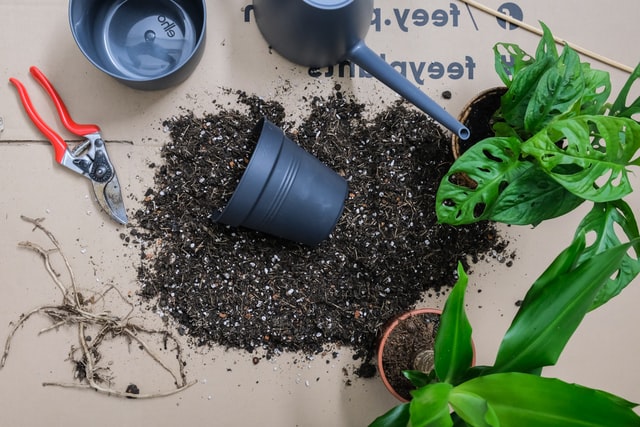
3. Fill the new pot with the new soil or growing media
Approximately 1/4 of the way up. You may need to adjust the base layer, depending on the length of your roots or the depth of the pot, but 1/4 to 1/3 is a good starting point!
4. Gently remove the plant from its old pot
If your plant is in a nursery pot, it can be helpful to squeeze the sides of the pot to loosen the plant a bit. If roots are poking out of the drainage hole, you may need to gently release them before removing the plant from the pot. Try to grasp the plant as close to the base as you can or gently pull from the root ball. Don’t forcefully pull the plant out. You don’t want to tear the stem or the roots.
5. Place the plant in the centre of the pot
This is where you’ll be able to tell if you need to add more soil or potting media to the base layer. You don’t want your plant to sit too deep in the pot.
6. Fill in the remainder of the pot with soil
Take care not to submerge too much of the stems, which could cause it to rot. You may find it handy to use a trowel, or even a small upcycled nursery pot to get the soil in the pot easily.
7. Once you’ve filled the pot with soil, tap the edges of the pot with the palms of your hands.
This will allow the soil to settle and fill in any air pockets. You may notice that you need to top up the soil a little bit after this process.
8. Water your plant
You may also need to add more soil if the potting media compacts from the water and it doesn’t seem like enough soil is in there.

What to Expect After You Repot Your Houseplant
Much like when you bring a houseplant home from the nursery, you may need to give your plant a bit of time to acclimate to your new pot. Give your plant some time to adjust, and don’t panic if you notice your plant looks a little unhappy during this adjustment process. While some plants may immediately begin thriving in their new home and start bursting with new growth, that’s not always the case. Have some patience, and keep an eye on your plant.
If your plant progressively or rapidly goes downhill, on the other hand, you may need to reevaluate. Make sure the new soil, the pot and anything else isn’t causing this rapid decline. Also closely monitor your plant for pests! Pests are drawn to plants that are stressed out, so repotting your plant may have rung the dinner bell, so to speak. Here’s more tips on how to prevent houseplant pests. I’ve attached some additional resources below with how-to videos to see repotting in action!
Additional Resources